
.svg)


The world of automation is fascinating. A few years back, people would hesitate in writing tests for UI, thinking it was cumbersome and needed extra effort and time.
Cut to all these years later, and we now have tools like Playwright Codegen, which can help you generate test scripts by recording user actions in a browser. What a wonderful time to be a developer!
One can be confident about the end-to-end quality of feature development, which is such a boon for people like me, who’ve spent many sleepless nights worrying about how to reproduce an issue from production to a non-production environment without tests, or who’ve worried something might break because things haven’t been tested extensively.
This also means that we can have tests generated while someone like a product manager is just exploring the website for various flows.
Let’s use this post to explore the world of Playwright Codegen, as well as how we can use this wonderful command-line tool to enhance our testing.
Playwright is an open-source library developed by Microsoft for the end-to-end testing of web applications
What Is Playwright Codegen and How Does It Work?
Playwright is an open-source library developed by Microsoft for the end-to-end testing of web applications. In order to make it even easier, Playwright comes with the ability to generate tests automatically while navigating a website on a browser through its Codegen offering. Let me explain how it works:
- One can run a CLI command with the website for which they want to run the test. Something like:
npx playwright codegen --output generated-test.spec.js demo.playwright.dev/todomvc- This opens a browser window and a Playwright Inspector window.
- One can then perform regular actions like clicking, typing, and navigating in the browser window.
- The Playwright Inspector window records all of this and writes real-time tests using all these interactions.
- Every click, form fill, and navigation gets translated into test code using modern locators and best practices.
How to Use Playwright Codegen for Test Automation?
We’ve established how Codegen works, but perhaps it’s better to see it in action. Let’s put on our curiosity hats and walk through a quick example of how we can make Codegen work for our use cases.
Setting Up Your Codegen Project
You'll need Node.js 16+ installed on your system.
Project Setup
Let’s create a new test directory:
mkdir playwright-codegen-tutorial
cd playwright-codegen-tutorial
npm init -y
After that, let’s setup Playwright:
npm init playwright@latest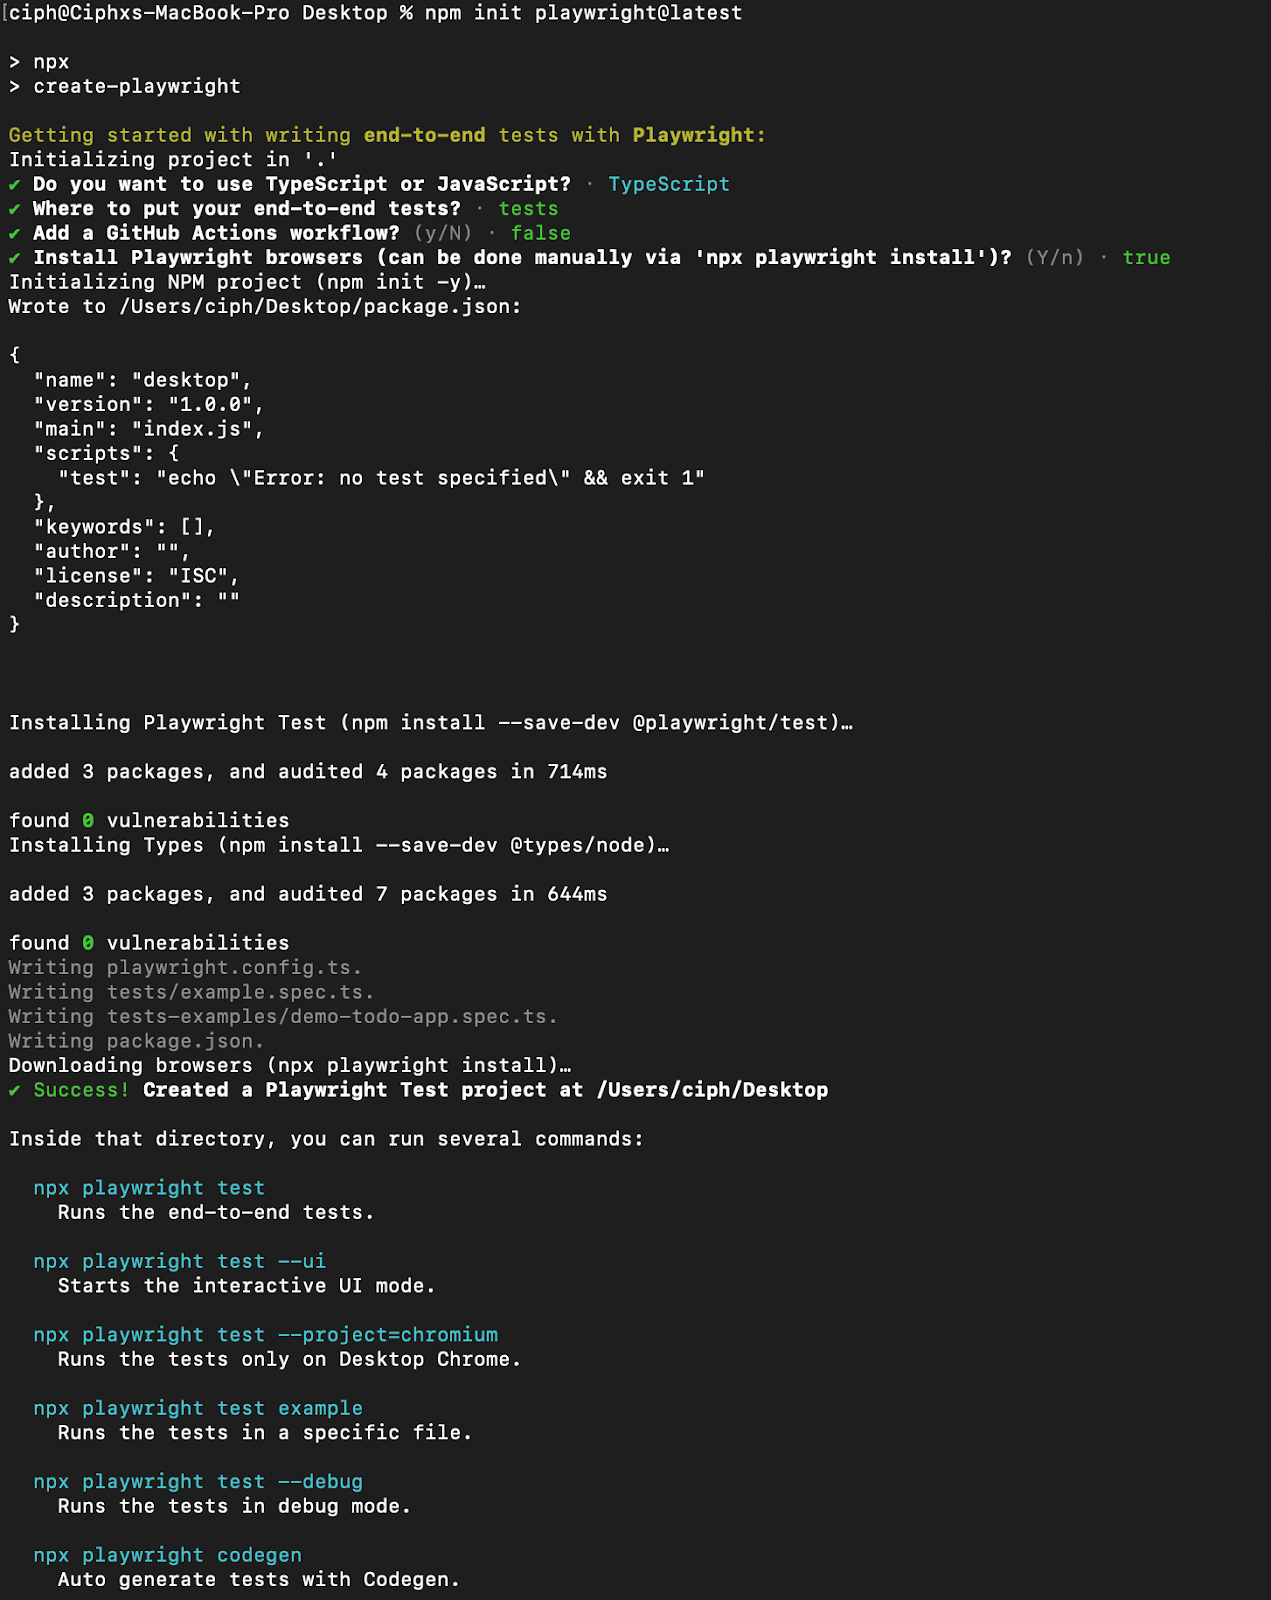
You’re now ready to witness the magic of Codegen unfold.
Running Codegen
Let’s now try to use Codegen to generate tests. The official documentation on Playwright website suggests using a ToDo website for testing, so we’ll also use the same. The command that works all the magic is:
npx playwright codegen --output generated-test.spec.js demo.playwright.dev/todomvcThe --output parameter captures all the tests that the recorder is generating in the generated-test.spec.js file.
Recording a Test
In the browser window, perform these actions naturally, as you would when manually testing:
- Add a todo: Click the input, type 1. finish testing, press Enter
- Explore the interface: Click Active, All, and maybe back to Active
- Add another todo: Type 2. document results of testing, press Enter
- Test completion: Check off the first todo
- Try different filters: Click between Active, Completed, and All
- Clean up: Use Clear completed button
- Continue exploring: Click various filters to see what happens
Important Note: Don't worry about being perfect! Codegen captures everything, including your exploration and mistakes.
The Generated Code: Reality vs. Expectations
import { test, expect } from '@playwright/test';

test('test', async ({ page }) => {
  await page.goto('https://demo.playwright.dev/todomvc/');
  await page.goto('https://demo.playwright.dev/todomvc/#/');
  await page.getByPlaceholder('What needs to be done?').click();
  await page.getByPlaceholder('What needs to be done?').fill('1. finish testing');
  await page.getByPlaceholder('What needs to be done?').press('Enter');
  await page.getByRole('link', { name: 'Active' }).click();
  await page.locator('li').filter({ hasText: 'All' }).click();
  await page.getByPlaceholder('What needs to be done?').click();
  await page.getByPlaceholder('What needs to be done?').fill('2. document results of testing');
  await page.getByPlaceholder('What needs to be done?').press('Enter');
  await page.getByRole('link', { name: 'Active' }).click();
  await page.getByRole('link', { name: 'Completed' }).click();
  await page.getByRole('link', { name: 'Active' }).click();
  await page.locator('li').filter({ hasText: '1. finish testing' }).getByLabel('Toggle Todo').check();
  await page.getByRole('link', { name: 'Active' }).click();
  await page.getByRole('link', { name: 'Completed' }).click();
  await page.getByRole('button', { name: 'Clear completed' }).click();
  await page.getByRole('link', { name: 'All' }).click();
  await page.getByRole('link', { name: 'Active' }).click();
  await page.getByRole('link', { name: 'Completed' }).click();
  await page.getByRole('link', { name: 'All' }).click();
  await page.getByLabel('Toggle Todo').check();
  await page.getByRole('link', { name: 'Completed' }).click();
});
Some things come to mind while looking at the code. One is that Codegen uses locators like getByPlaceholder(), getByRole(), and getByLabel(). It captured all the actions and nothing was missed. The output is actual code that can be used to run tests.
But we can also notice some issues, like the fact that there are some redundant calls and multiple filter clicks, owing to exploring the interface, and they’ve been captured multiple times as well. There are also actions in the code, but no verification of outcomes. The test is named as test, which is generic and doesn’t give insight into what these tests are.
But before you give up, this is pretty standard, as Codegen captures everything you do, including exploration, mistakes, and redundant actions.
Running and Validating the Script
Let’s try to run this script and check if it actually works. In order to run the test, we can use the following command:
npx playwright test generated-test.spec.jsWe’ll notice that the test fails with the following error:
Pending operations:
      - locator.check at generated-test.spec.js:17:95

  Slow test file: generated-test.spec.js (30.0s)
  Consider splitting slow test files to speed up parallel execution
  1 failed
    generated-test.spec.js:3:5 > test
This happens because the rapid filter clicking (Active → All → Active → Completed → Active) corrupts the TodoMVC app's JavaScript state. When we then try to check a todo, the click succeeds but results in broken JavaScript that closes the entire page. This shows how Playwright's generated tests can expose real application bugs through unrealistic interaction patterns that human users would never perform.
While we successfully debugged this failure, we had to go through several hoops of writing debug scripts, analyzing logs, and debugging code to figure this issue out. This is where Autify Nexus evolves beyond raw Codegen with AI-powered test creation that understands user intent rather than just capturing every exploratory click.
Now that we understand the problem, let's clean up the generated code to create a working test:
import { test, expect } from '@playwright/test';

test('todo app test', async ({ page }) => {
  await page.goto('https://demo.playwright.dev/todomvc/');
  await page.goto('https://demo.playwright.dev/todomvc/#/');
  await page.getByPlaceholder('What needs to be done?').click();
  await page.getByPlaceholder('What needs to be done?').fill('1. finish testing');
  await page.getByPlaceholder('What needs to be done?').press('Enter');

  // REMOVED: The problematic rapid filter sequence that corrupted app state
  // await page.getByRole('link', { name: 'Active' }).click();
  // await page.locator('li').filter({ hasText: 'All' }).click();
  // await page.getByRole('link', { name: 'Active' }).click();
  // await page.getByRole('link', { name: 'Completed' }).click();
  // await page.getByRole('link', { name: 'Active' }).click();

  await page.getByPlaceholder('What needs to be done?').click();
  await page.getByPlaceholder('What needs to be done?').fill('2. document results of testing');
  await page.getByPlaceholder('What needs to be done?').press('Enter');

  await page.locator('li').filter({ hasText: '1. finish testing' }).getByLabel('Toggle Todo').check();

  await page.getByRole('link', { name: 'Completed' }).click();
  await page.getByRole('button', { name: 'Clear completed' }).click();
  await page.getByRole('link', { name: 'All' }).click();
  await page.getByLabel('Toggle Todo').check();
  await page.getByRole('link', { name: 'Completed' }).click();
});
We’ve cleaned up the code to remove the rapid filter sequence that broke the app and kept everything as per the code generated by Codegen.
Benefits of Using Codegen for Test Automation
Despite the challenges we encountered in our very real example, Playwright Codegen also offers significant advantages that make it quite a valuable tool for automation. Some of them are:
- There is zero learning curve for non-programmers. Run a command and voilà, you have working test code. There’s no need to learn complicated syntax, and manual QA folks or product managers can quickly validate flows.
- It’s super handy and quick and generates functional code in minutes. Even with the debugging step, which might not always happen, the turnaround time can potentially be less than handwriting these tests.
- The beauty of Codegen lies in the fact that it generates robust locators for tricky elements.
- It also handles multi-step workflows across different pages and manages complex interactions like form interactions, file uploads, and dynamic content. The generated code has the added advantage of supporting multi-browser testing.
- Codegen even supports mobile device emulation.
- Another super handy way Codegen can be used is to stress test applications in ways manual testing can not. It can expose edge cases and race conditions through all the interactions, as well as help identify usability issues in the application.
Not all failures reported in a Codegen test might be worth exploring, and some can occur due to unrealistic usage patterns
Conclusion
While Codegen comes with a plethora of advantages, we’ve already discovered one drawback during our execution. The raw output produced by Codegen does require some human refinement, as it might contain many exploratory actions that aren’t useful for the intent of a test.
Not all failures reported in a Codegen test might be worth exploring, and some can occur due to unrealistic usage patterns. But the true power of Playwright Codegen isn’t in generating perfect tests—it’s in the democratization of tests.
Playwright Codegen is an excellent starting point for your test automation journey. Master its capabilities, understand its limitations, and use it as a foundation to build more sophisticated testing strategies as your needs evolve.
This also means that there is work beyond the initial sketch pad that Codegen provides—such as cleaning up code, structuring the tests, managing any shared logic and refactoring relevant code, removing flaky selectors, or fixing code like we did above. And in order to derive the most value out of an automation suite, it should also be added to the CI/CD pipeline.
How AI Powered Testing Platforms Help
Therefore, this is exactly where AI-powered testing platforms become valuable. Platforms like Autify Nexus are built on Playwright and offer a “Low-Code When You Want It, Full-Code When You Need It” approach, allowing you to harness the full power of AI while maintaining control and finesse over quality in every way.
They offer you an end-to-end pipeline where you can generate the tests using a recorder-based approach through simple natural-language-based prompts facilitated by generative AI, and then you can plug them into your CI/CD and run them without manual intervention. This lets you use much of the functionality right out of the box, while also allowing you to have sufficient control over the entire process.


